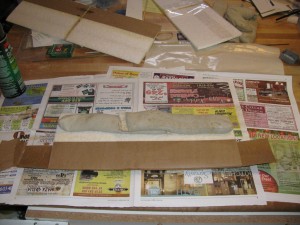
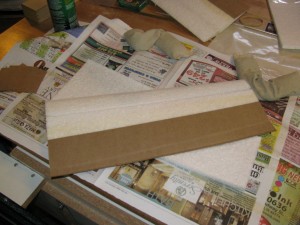
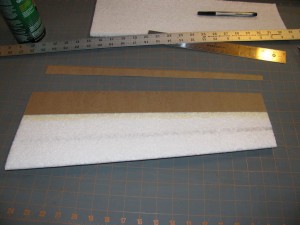
So, yesterday I got it into my head to take pictures of how I’ve been applying the kraft paper laminate to the trailing edge of my latest prototype Push-E Cat wing build. Then, having obtained the pictures, I got distracted and wandered off to work on things like solid models and instructions. Then today my goodie package from Hobby King finally arrived and…
Anyway, here’s the pictorial walk though of the process. Oh, and one thing right up front: glue in the spar first when you’re doing the wing tips. This is exactly backwards from the way you do the mains, but the mains don’t have washout.
The one thing I always remind folks who are building Push-E Cats is that you’re not building a “foamie”. Some people get it in their heads that anything that uses foam as a base material is some sort of cheap-ass disposable thing for filling in a gap in the flying season. What you’re building is a composite airframe that designed for maximum durability without compromising flight characteristics. “Composite” means “made of multiple materials” not “made exclusively of expensive carbon fiber and epoxy”. The use of the kraft paper is a prime example of this. You choose materials for composite construction that complement and support each other by adding necessary characteristics to achieve performance goals.
Just sayin’. Moving on…
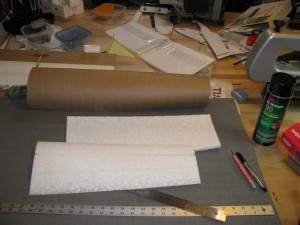
To do this, you need the kraft paper, some straight edges, a ruler, a pen, an X-acto or other really sharp piece of knife, the 3m 90 spray adhesive, and a goodly amount of newspaper or other sacrificial spread-it-around to keep the glue off of your stuff.
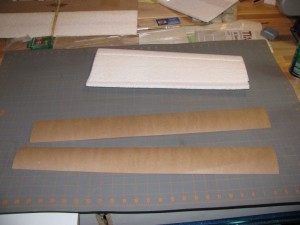
Step one is to cut some 3″ wide strips of KP laminate that are wider than the core section is long. Use a straight edge to make sure you have a straight line to work with when you go to stick the paper to the core.
Step two (which you can also see in the picture above), is to mark your core as to where you want to line up the paper. For the PEC V5 wing tips, you measure 4.5 inches from the leading edge at the root and 3.5 inches at the tip. Don’t measure from the trailing edge because that varies wildly depending on hot wire path variation. (Yeah, I know, gravity drag stuff adds in a bit of variability, but it doesn’t affect the flight characteristics at all at this level. Get over it until I sell enough kits to afford a hot-wire CNC.)
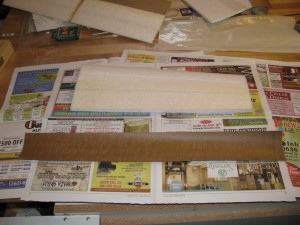
Step three, lay down the newspaper and apply the adhesive. Okay, a word or two about 3M 90, why I’m using this, and how it’s different from our old standby, 3M 77.
3M 90 is a serious spray adhesive intended for installing things like kickplates, heavy laminate tops, and other things that don’t have a problem being coated with solvents like lacquer thinner, toulene, acetone, etc (which is EPP in a nutshell. It simply doesn’t care when you spray stuff like this on.) The primary advantage for me and the Push-E Cat is that it is FAR more thermally stable than 3M 77 ever was. 3M 77 was intended, as near as I can figure it, to glue things like paper and styrofoam together. Then 3M went suddenly stupid and added acetone to the mix, which nixed using 77 for styrofoam. (They have since added an entirely separate spray adhesive for styrofoam. I saw it on the shelf at Menards.) The problem with 3M 77 has always been that on a hot summer day, it simply gives up. 3M 90 does not.
The downside of this is that you absolutely must not use 3M 90 in an enclosed space with inadequate ventilation or, in my case, overuse it in a space with inadequate ventilation. For modelers, it’s probably not much of an issue. If you were using it in a production environment, well…anyhow, don’t be stupid and gas yourself or — worse — allow the fumes to build up to the point where the pilot light on your water heater generates a fireball in your house or shop.
Which could happen if you’re really, really careless or just too damned stupid to live.
So, just to make sure that we’re all on the same page: 3M 77 – not particularly dangerous but not particularly suitable for anything that’ll ever get warm or see sunshine (I use it all the time in the shop to make templates, for example.) 3M 90 – will hold your plane together all summer long but you better treat it with some respect or it’ll bite you (i.e. if you’re feeling woozy, for Christ’s sake open a window and get out of the damned room before you croak — or explode.)
And just to tamp down any pending panic attacks: I did all of this in my garage shop with a kerosene heater burning on the far side and right in front of my gas-fired water heater and furnace. The key is to do a little and then let the air clear between steps so that you’re not building up a dangerous level of solvent fumes at any time.
Anyway, on the practical side, 3M 90 goes down a little differently than 3M 77, so you need to be prepared for it. 77 comes out as a go-everywhere mist, which is annoying as hell sometimes – floats all over the shop and coats everything within a 5 foot radius with a dust-catching adhesive tack. 90, on the other hand, is much better to work with. The material is more dense and the nozzle dispenses it as a “lace” type spray. It goes where you spray it and pretty much nowhere else. The down side of this is that you need to make a minimum of three passes over the target surfaces to make sure you’ve laid down a proper coating. The best part of 90 is that once the volatiles gas off, the adhesive won’t garner dust bunnies. It’ll still serve as a good surface for ironing on the Ultracote later but, unlike 77, it’s not perpetually tacky.
When you’re ready to apply the adhesive, do it like you’re spray painting, where you start spraying off of to the side of your parts and then stroke along the length. Go over it a minimum of 3 times without letting the glue “pool” (which extends the time to “tack” interminably.) You get a 10 minute working window from the time you spray to the time that the adhesive quits wanting to bond properly. Usually, within 3 minutes you’re ready to rock as noted by tapping your knuckle against the adhesive surface and feeling tack without picking up any adhesive on your skin.
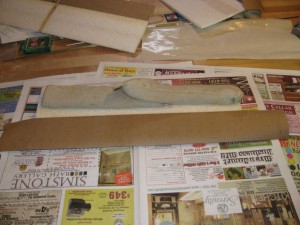
Okay, a couple of things on step four that are kind of inobvious from the picture: first off, the tip core has been securely weighted down in the core bed using some of my favorite tool in the world, shot bags. The reason for this is the aforementioned washout which is designed and cut into the wing tip cores. Given how flexible EPP is, it would be really easy to roll the washout away on a flat surface or otherwise twist the core if you didn’t take some precautions, especially since the kraft paper laminate will essentially “lock down” the twist in the wing at this point.
Point two, you want to make sure that you rub the paper down into the core firmly on every square inch of the mating surface. Use a small paint roller if you don’t trust your fingertips. Make sure that you get the glue to mate everywhere you possible can. I work from the middle out to the ends after carefully lining up the edge of the laminate with the line I marked on the core first. It’s worked really well so far with no bubbles, creases, or ripples.
So, what I do after I get the top surface laminate rubbed down is use the X-acto knife to trim the excess from either end of the core. I do NOT trim the trailing edge, just the core ends so that I can see what I’m doing and keep the next sheet of kp lam from sticking the first one except at the trailing edge.
Right, so what you do then is flip the core over, measure your alignment lines on the bottom if you haven’t already done it, and then get the next piece of kp lam that you cut. earlier. Spread out some fresh newsprint and repeat the 3M 90 spray fest.
Then you line up the straight edge of the kp lam with the line on the core like before. However, other than tapping the very edge to hold it in place, don’t rub it down. Instead, flip the core over and put it back in the core bed. Then press the whole mess down on the core bed, rubbing back and forth on top of the first KP lam layer you put down. One quick point here, though: do NOT press the trailing edge together. Keep your attention focused on the foam-paper interface, not the paper-paper interface.
The goal of this exercise is to lock in the washout angle as best you can. It’s important here because once your get the second piece of kp lam put on, that trailing edge isn’t going anywhere without a lot of encouragement.
After you’ve made sure the kp lam is firmly adhered to the foam, you can then put the core on a flat surface and run your thumb along the trailing edge to “crimp” the paper together for a razor sharp line.
And, at long last, we’re ready to make that final trip. Measure back 7 inches at the root and 5 inches at the tip, line up the straight edge, and then slice off the excess from the trailing edge with your X-acto.
All done! Tomorrow I should have some pictures and discussion about the motors and stuff I just received and I’ll be looking for recommendations, too.

