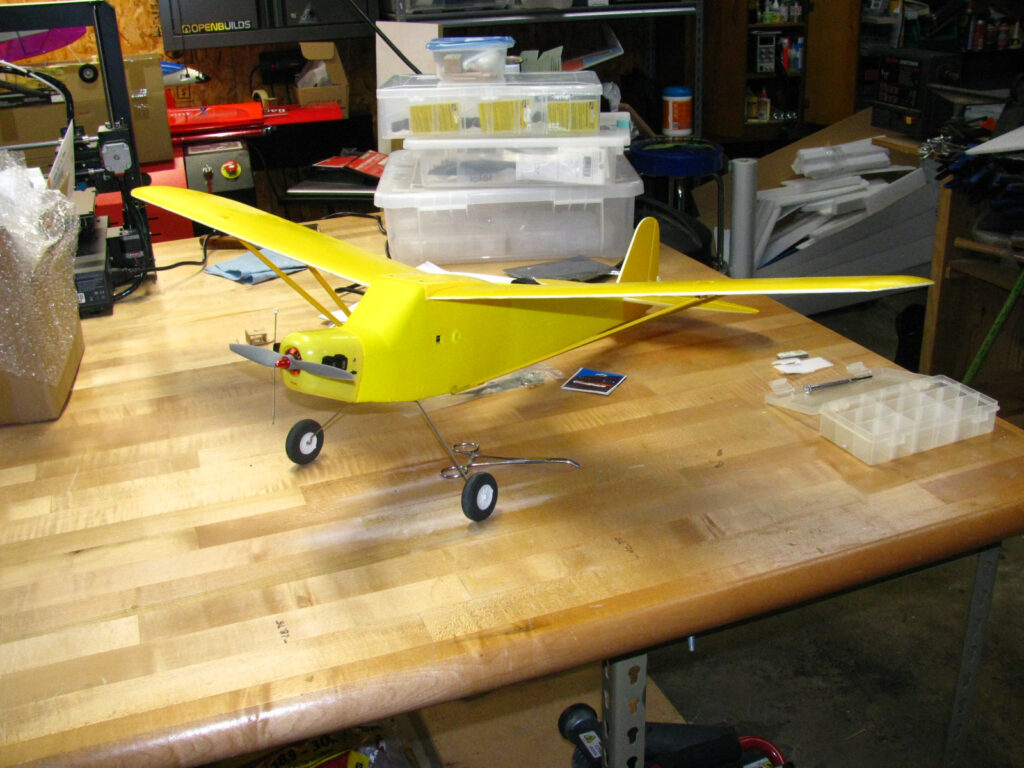
I wrote a somewhat lengthy Facebook post about this project and realized that I needed to drop it here, too.
Finished up a “distraction project” from the Bob Wade legacy this afternoon.
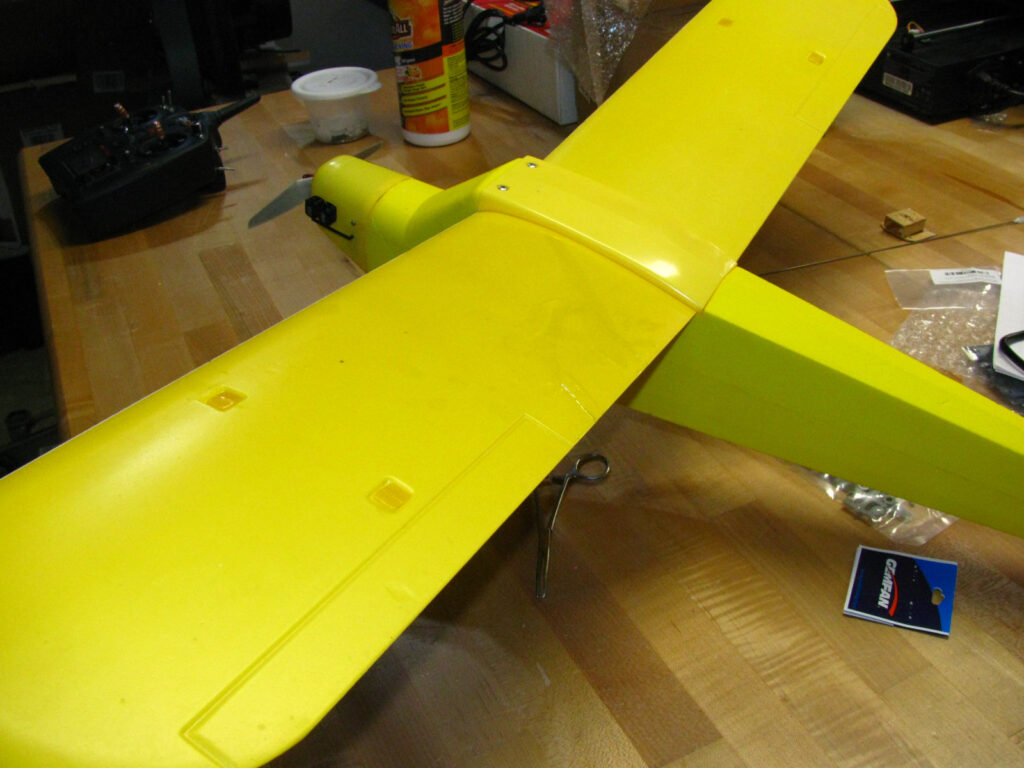
Apparently, Bob Wade had a go at converting a Harbor Freight toy RC plane to brushless that hadn’t ended well. The port wing panel was fractured out and he had apparently just cut the pushrods short when extracting the servos from the carcass.
An old TowerPro brushless motor was in the nose on a pieced together plywood box, which kind of tells me where things went wrong. It was just too much motor for such a small plane and, given the probable time frame, I’m betting the battery pack to feed it wasn’t a very good fit.
In any case, if I’d had more sense I probably would have just chucked it into the burn pile and been a richer man.
Yeah. Well.
The wing and tail are made from what is essentially Depron that’s surfaced with a thin layer of plastic laminate. There was just something about the wing damage that I couldn’t leave alone. I knew I could fix it.
And that’s what I did. I brought it in from the Hangar to fix the wing. Turns out that Gorilla Glue Clear non-foaming worked great at not only putting the jigsaw pieces back together again, but it also formed a new skin that bonded with the old skin. It was a great fix. (Also, I used some new polyester plastic sheet I just got as intended plans protector to work as ersatz Mylar to make the skin smooth while the glue cured. That really helped.)

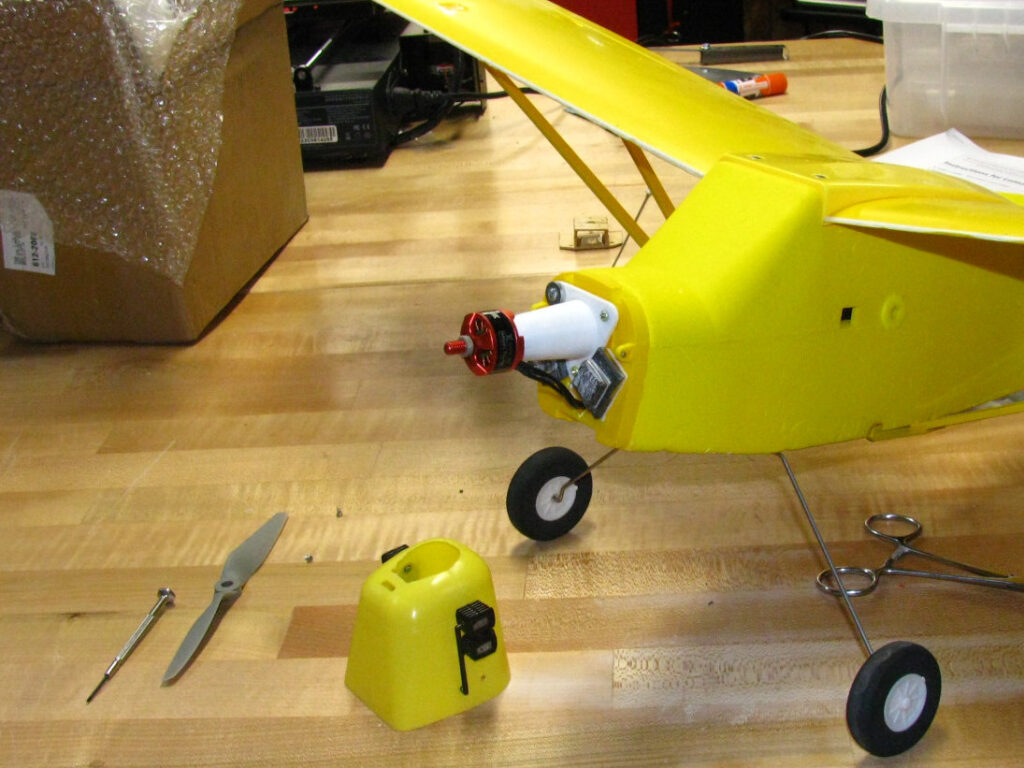
Once the wing was fixed, I was stuck. My urge to fiddle and fix had been released.I sourced a little drone motor from Willy Nillies to replace the ginormous TowerPro, ordered 800 and 850 mAh 3s packs from RCBatteries, and dug out and tested two scavenged MX-50 servos from the scrap bin.

One of the old push-rods was re-usable. The other I replaced with a 1/16″ wire fab. Du-Bro EZ connectors went on the servo arms and that took care of actuation.
I had procured a stock of Lemon receivers a while back and broke one out for this project. Got it bound and set up. Added a HobbyKing 12 amp speed control with XT-30 connector.
I also fired up the 3D printer to make a replacement motor mount that would put the motor just proud of the cowling. Took several print attempts to re-learn what I needed to make it work, but work it did eventually.
Because of the layout of the model, I ended up having to add 1.5 ounces of lead to the firewall to get it to balance, which is annoying. Unfortunately, pushing the battery pack into the nose just wasn’t feasible without compromising the hard plastic inserts for the battery bay.
It’s done. Everything works like it should and the balance seems reasonable. Will try to get it out to the field Friday evening or Saturday afternoon before the ball game to see if I actually pulled it off.
More to come after that.
